|
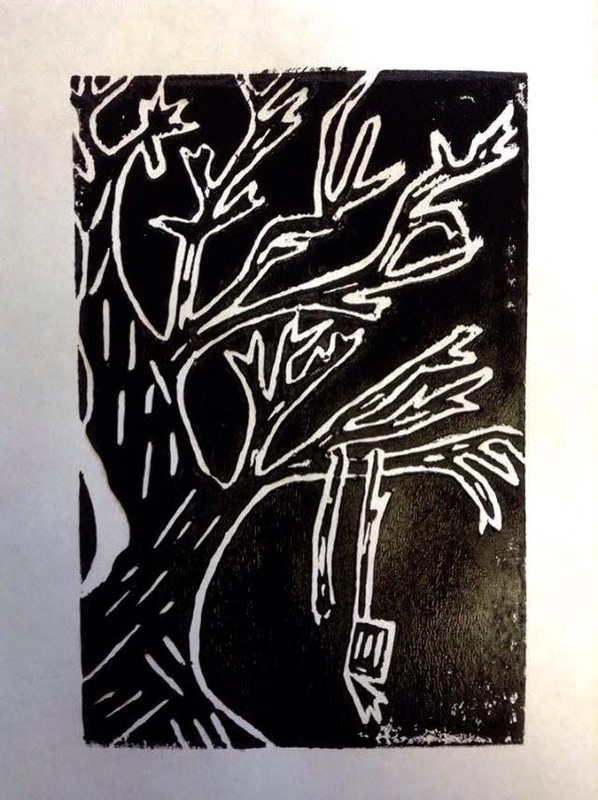
Title: Damaged
Medium: Ink on plastic Size: 17.5 cm x 12.5 cm November 10, 2015 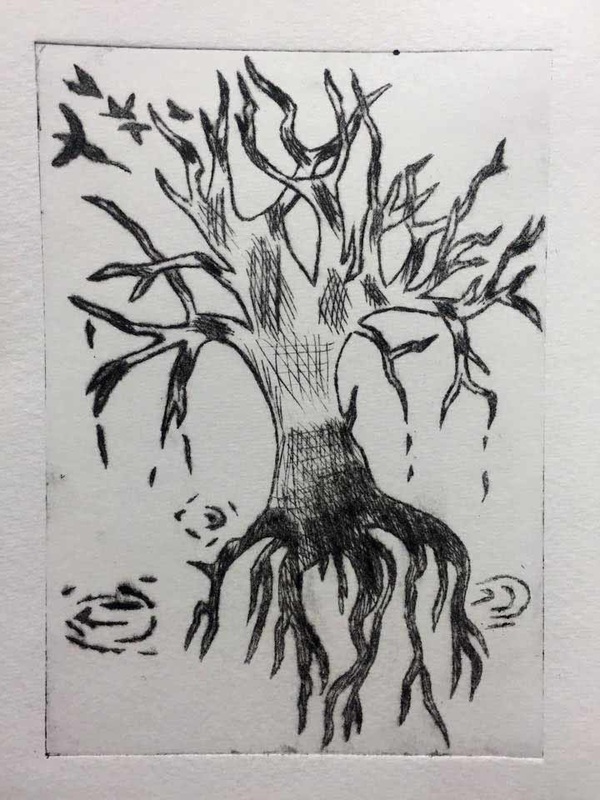
|
Exhibition: I created my piece the way that I did because I wanted to make it go with my previous work of my block print. I kept the theme and artist inspiration the same because they have a lot of the same qualities and details. However, I feel like this piece turned out to be a lot better. However, I do feel like there could be some improvement, and if I were to do it over I would draw the piece itself backwards, so when you flip it, it would come out to be the way I want it to be.
|
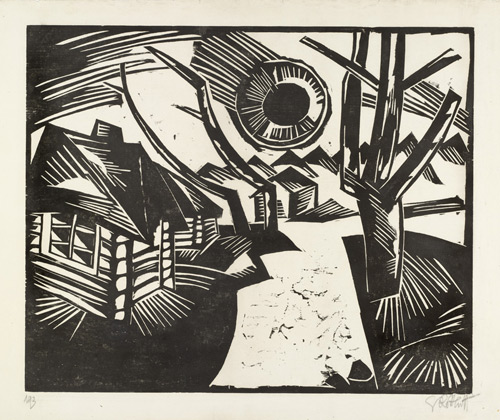
Inspiration
|
Planning & Process First Slide: This slide shows the first initial sketch that I was going to do for this piece. I wanted to use a flower that was withering to represent something beautiful slowly coming to its end, but I decided not to do it last minute. I wanted something with more detail.
Second Slide: This slide shows a sketch that I made of a rose coming into full bloom. I created this to show the process of something that seen as so sacred and as a symbol of love coming into its life. I was thinking of using this for my final piece, but I would have had to downsize the sketch quite a bit, and the flowers themselves would be too small. Third Slide: This slide shows my final sketch for my piece. I thought that this one came out to be the cleanest, and best one that fits for what I'm trying to do. I knew that after I carved into my actual piece itself, i could begin to create the detail. I left it out on this sketch to make sure my lines were clear and that I knew where I was carving. Fourth Slide: This slide shows my carved piece after I finished cleaning the ink off, and right before I began the printing process. I added this photo here to show somewhat of an idea on what my piece looks like, after detail and ink have been added. In case if I wanted to go back in and add some more. |
Attempts & Struggles First Slide: This slide shows my first attempt at inking my project. For being the first try I think that it went well, but more ink should have been added.
Second Slide: This slide shows my second attempt at inking. It went a little bit better than the first one, because the ink is more prominent on one side. But, one side needs to be more visible. Third Slide: This is my final attempt at getting a good print for my final piece. On this attempt, I was able to get what I was looking for, and the only thing I had to do to make it more visible was edit the saturation and contrast. Struggles In the creation process of this piece, I did run into a few obstacles. The first one being what I actually wanted to create. In the first few days that we were assigned this project, I had absolutely no idea on what I wanted to do. After a long thought process, I finally decided to put it along with my block print piece.
Another struggle that I encountered was the actual inking process itself. The first time inking I put way too much on, and the second I put way too little. Taking the ink off of the plastic would have to be the hardest part. It was also the thing that took the longest to actually do. Rubbing the ink off the plastic requires a lot of time and effort and if you take off too much ink, your print will not turn out the way you were expecting. I struggled with that a few times, but eventually I did get the hang of it. When the whole process was over, I realized that I actually really enjoyed doing this, and might even do this again for future projects. |